iPhone Note #1: Updated: Code Ambiguous Error. XCode upgrade wont create IPA archive, fails silently.
I have an old iPhone3G (8GB) and just recently bought an iPhone3GS (16GB).
-
Backup and sync old iPhone3G.
-
Power on iPhone3GS (new), insert a sim card and sync it to iTunes. Congratulations, you now have an activated iPhone.
-
Open up XCode -> Organizer.
-
“Use it for development”
-
Copy the identifier
-
Open up a browser, login to http://developer.apple.com and go to the “Program Portal”
-
Under Devices -> Add Devices.
-
Enter a new name, “iphone3GS” and the 40 hex identifier “xxxxxx…”
-
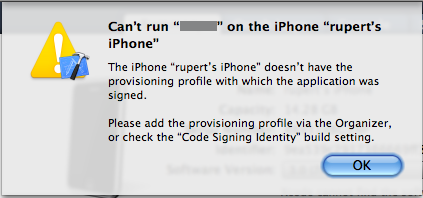
If you try to deploy an application at this point from XCode it will tell you that “A valid provisioning profile for this executable was not found”. Dont worry, we will create the provisioning profile in the next steps.
-
App Ids -> New App Id.
Description: Applications by gismobiledev
Bundle Seed ID: Generate New
Bundle Identifier (App ID Suffix): gismobiledev.* -
Provisioning -> New Profile.
Profile: RDG_iPhone3GS_Development_Profile
Certificates: “Check the box” next to your name.
App ID: Choose “Applications by GisMobileDev”
Devices: “Tick the boxes for each device that you want to use” -
After submitting, I noticed the status to be “Pending”. Refresh after a few seconds and the status will change to: “Active until xxxxx”.
-
Download your new provisioning profile.
-
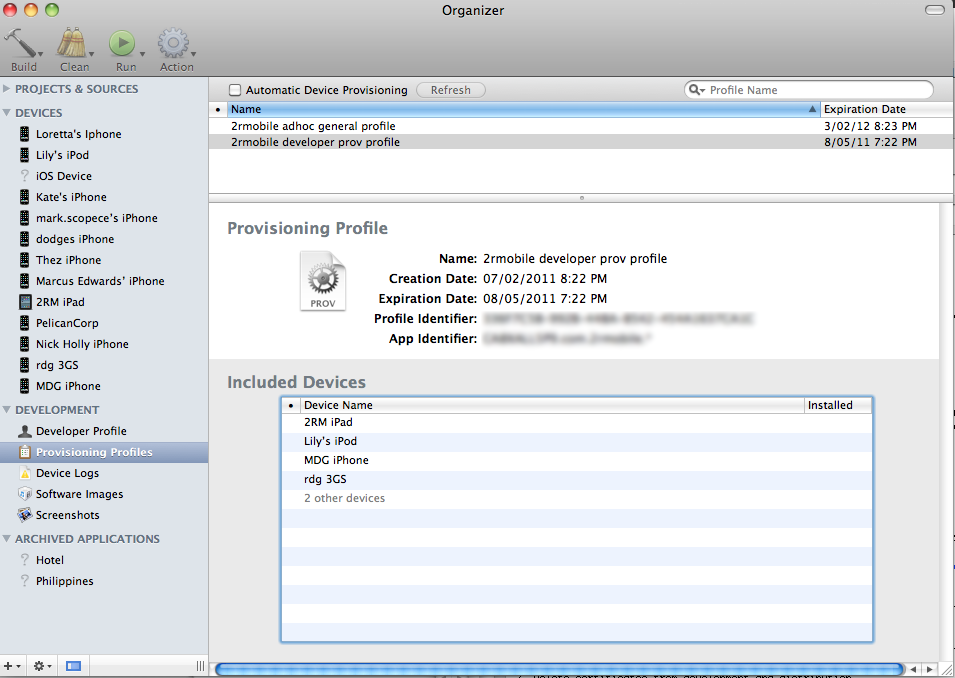
From the Organizer, add the new provisioning profile. Don’t get too excited. You still can’t deploy on the iPhone3GS device. Why? Read on..
-
If you have an existing application that was code signed from a previous profile, we need to tell XCode to use the new provision profile for the new device.
-
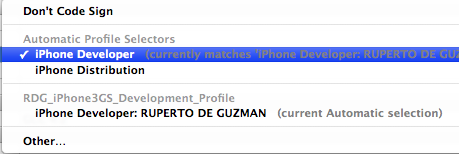
XCode -> Open your application -> Project -> Edit Project Settings. Most likely, the Code Signing Identity is still using the old provisioning profile. Where is it?
-
/Users/rupert/Library/MobileDevice/Provisioning Profiles . You can delete the old profile if you don’t need it. Drop the new provisioning profile from here. Afterwards, check again step 17 above. This time around XCode should detect and display the correct profile.
- What if you have an existing application identifier for the application? Hey, I just created one from the Program Portal, we need to tell XCode to use that identifier! Navigate to your [application]-info.plist and change the Bundle identifier to gismobiledev.${PRODUCT_NAME:rfc1034identifier}. So if you defined “gismobiledev.apps.*” in your Application Id in step 10, then that’s the same string we use in the Bundle Identifier in info.plist.
- Build and Go. Enjoy!
UPDATE (JAN 07, 2010)
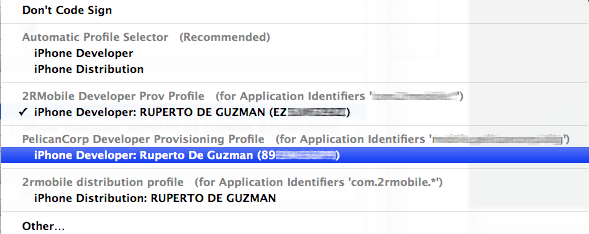
Problem: “codesign ambiguous” error
I am having problems with a “codesign ambiguous” error from XCode. It seems confused because I just added another iphone developer certificate for another company I am working with.
BEFORE:
[1] iPhone Developer: RUPERTO DE GUZMAN
[2] iPhone Developer: RUPERTO DE GUZMAN (89xxxxxxxx)
To resolve this issue, you need to REVOKE [1] above from the PROGRAM PORTAL. After revoking, create a new certificate. Now you should have something like this:
AFTER:
[1] iPhone Developer: RUPERTO DE GUZMAN (EZxxxxxxxx)
[2] iPhone Developer: RUPERTO DE GUZMAN (89xxxxxxxx)
Now, all is good and I don’t have anymore “codesign ambiguous” problems anymore. Note: If you revoke the a certificate, all the developer provisioning profiles associated with the certificate would need to be changed as well. This means most likely you will end up with this process:
step 1: Revoke OLD CERT create NEW CERT
step 2: Create a new DEVELOPER PROVISIONING PROFILE
step 3: Migrate it to the devices.
step 4: BUILD and DEPLOY to devices
When codesigning from XCode, you can now choose from the “PROJECT SETTINGS” which certifcate to use.
UPDATE (FEB 26, 2011)
Problem: XCode will not create an IPA archive and will silently fail. Most likely, your development and distribution certificates has just expired. Let’s start clean.
-
Login to http://developer.apple.com/iphone. Go to IOS Provisioning Portal
-
Delete certificates from development and distribution.
-
Generate a new certificate signing request from Keychain.
-
Submit it to the respective Certificates.
-
Download the certificate and install it in Keychain.

- Create the necessary provisioning profiles (development and adhoc) and install/dragging it in XCode > Organizer
Normally, you should be able to build both for developer and AdHoc. However, I noticed that when I upgraded XCode, creating an IPA archive just fails silently. Silently? When I click “Save to Disk” nothing happens.
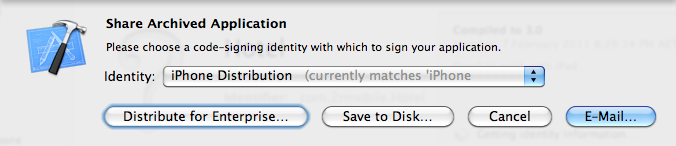
What is the normal behaviour when I click “Save to Disk”? You should see “creating IPA archive” followed by a window/dialog to give a filename for the IPA